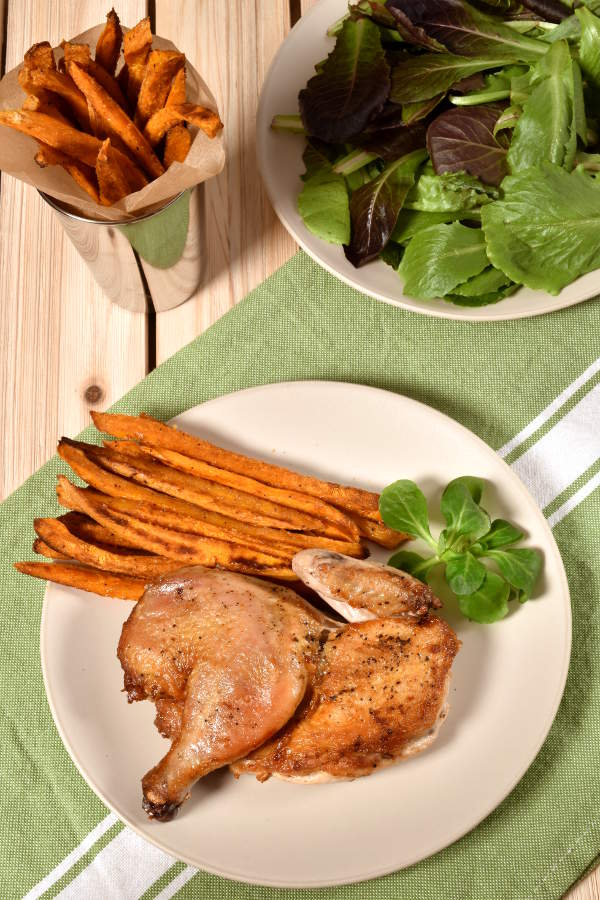
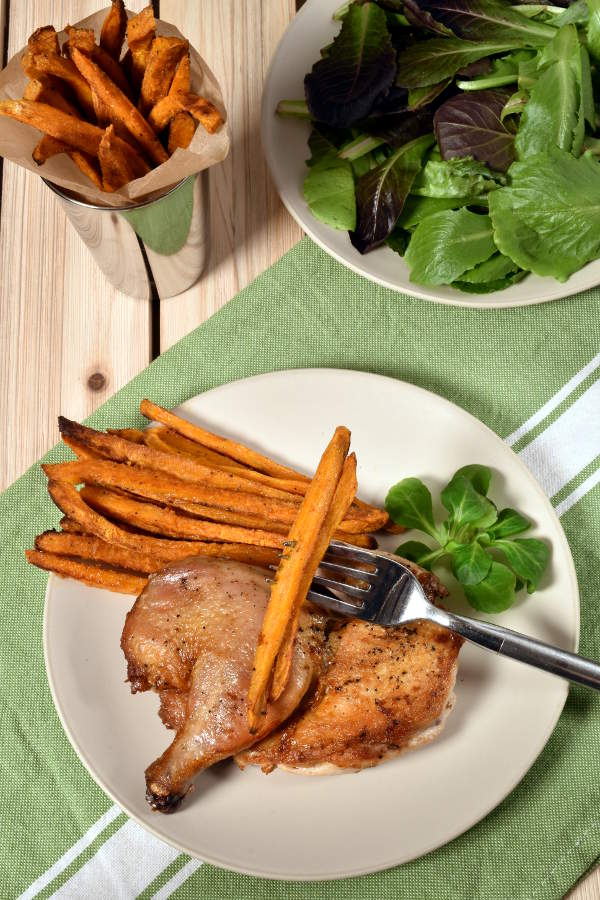
Cornish Hen Under a Brick gives you super crispy skin and juicy meat. No actual brick required! Can be made with chicken too. Sweet and salty sweet potato oven fries on the side.
What is Cornish Hen Under a Brick?
The traditional Tuscan method of cooking chicken under a brick, or al mattone, uses the weight of a brick to press a flattened piece of chicken directly onto the grill. This helps the skin crisp up and the meat cook evenly. Super crispy skin with juicy meat? That’s the perfect poultry.
Here I’ve tweaked the cooking method to use a cast iron pan instead of an actual brick. I’ve also used a Cornish hen, which is smaller than a chicken, to cut down the cook time. You will need two cast iron pans, one larger to cook the hen in and one smaller to use as your “brick” on top. If you don’t want to buy Cornish hen or can’t find it at your supermarket, you can easily use a whole chicken for this recipe, as long as your pan is large enough to fit it. (If you are using chicken, after you flip it over, you will finish the chicken in the oven. See recipe notes for details.)
It’s helpful if you have kitchen shears to debone the hens, but you can use a knife for everything. If you have some pantry staples, you’ll only need to get two ingredients for this recipe: a Cornish hen and a couple sweet potatoes.
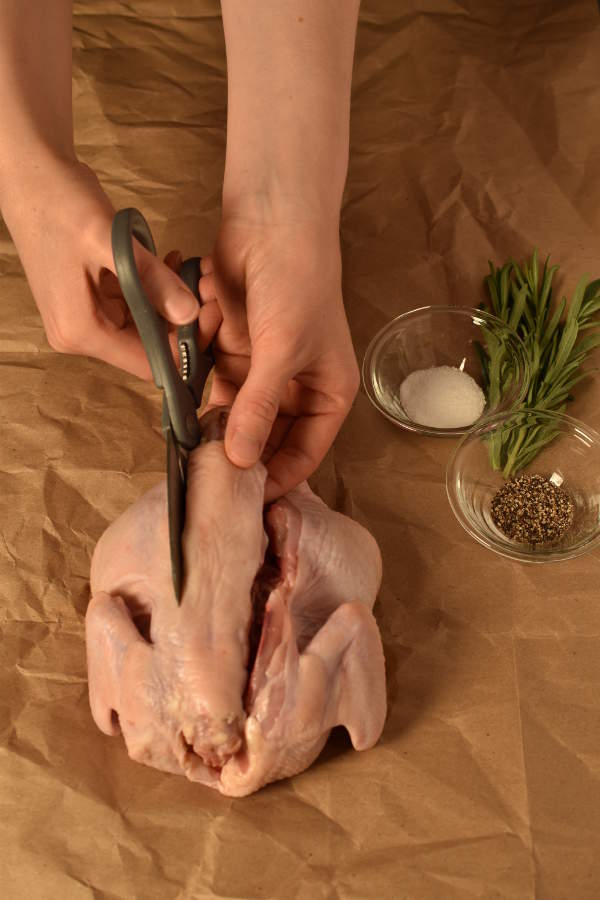
In step 2 in the instructions, I have you flatten and partially debone the hen or chicken. It’s not hard, but I took some step by step photos to guide you through the process. It’s the same process for a Cornish hen or a chicken.
How to Prepare Cornish Hen Under a Brick
Let’s take a look:
First, turn the bird upside down and use kitchen shears to cut along each side of the backbone to remove the backbone.
If you like, you can save the backbone in a baggie in your freezer and use it later to make stock.
Next, use a paring knife to cut along both sides of the breast bone (the soft, cartilage-like bone) and then use your fingers to pull it out. (You can also use shears or a knife at the end where it’s harder.)
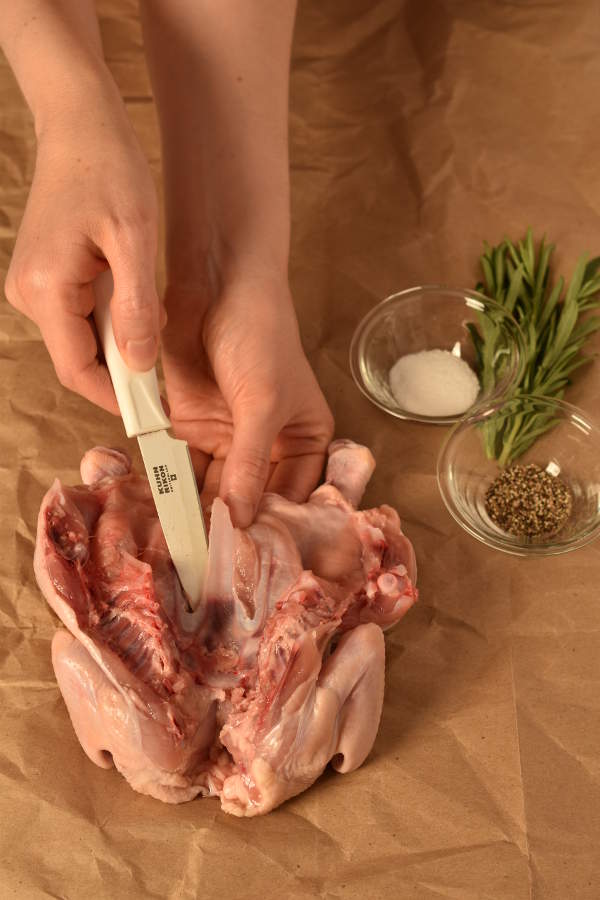
Then cut the hen completely in half along the line where the breast bone was. Slip a paring knife under the rib bones and cut them out from each half.
Lastly, cut off the tip of the wings.

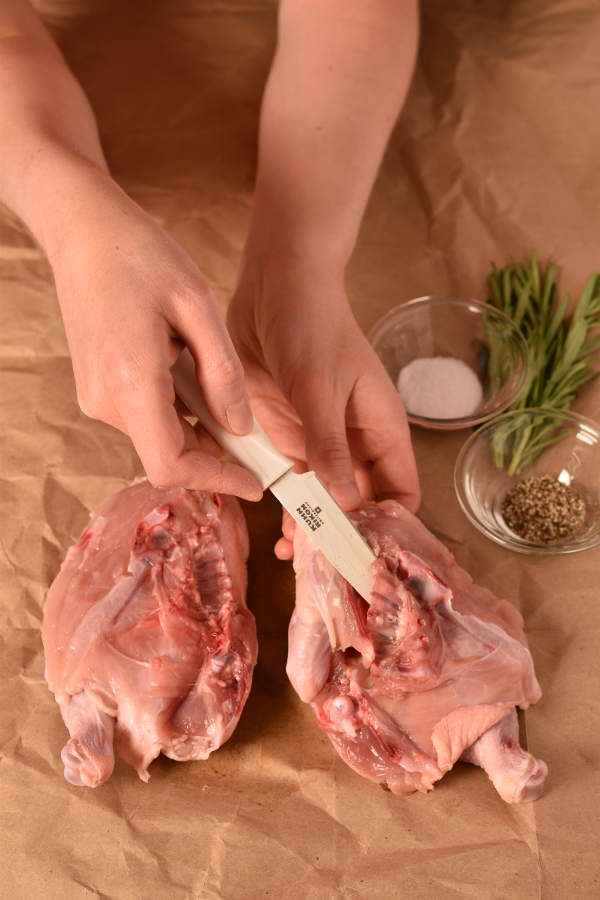
Your two pieces should now lie flat. If not, you can help it along by giving it a good smack with a heavy-bottomed pan.
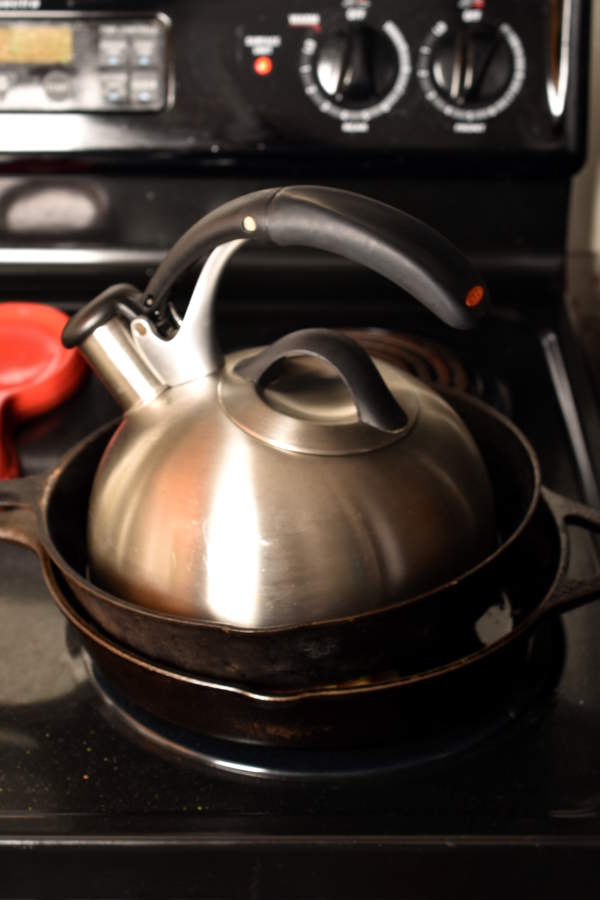
In step 3 in the instructions, you use a second smaller pan over the hen with something heavy in it to weigh it down. I used my teapot filled with water. You could also used canned goods. I took a quick picture here to show you my set-up:
What to Serve with Cornish Hen Under a Brick
Now let’s talk sides. The hen is really the star of this meal, so I chose to keep the sides simple, rounding out dinner with sweet potato oven fries and salad. In last week’s post, I shared a recipe for sweet potato mash—I hope you guys like sweet potatoes!
So I often make baked “fries” with regular white baking potatoes, like the ones used in this recipe. Cut the potatoes into fries, toss with some oil and salt and pepper, and bake. So simple and easy, and I actually prefer them to real deep-fried fries. If you prefer white potatoes to sweet potatoes, definitely make those!
The first time I tried to do the same thing with sweet potatoes, I was very disappointed. I ended up with limp, mushy sweet potato sticks that were really as far from crispy as you can get. After some online research, I quickly learned that you need to add starch to sweet potatoes to get them to crisp up when baked. My second batch came out way better: sweet, salty, crispy, just slightly oily… exactly how sweet potato oven fries should be. After some further experimentation, I realized I like them best with paprika and garlic powder. You can use any seasonings you like, just don’t leave out the corn starch.
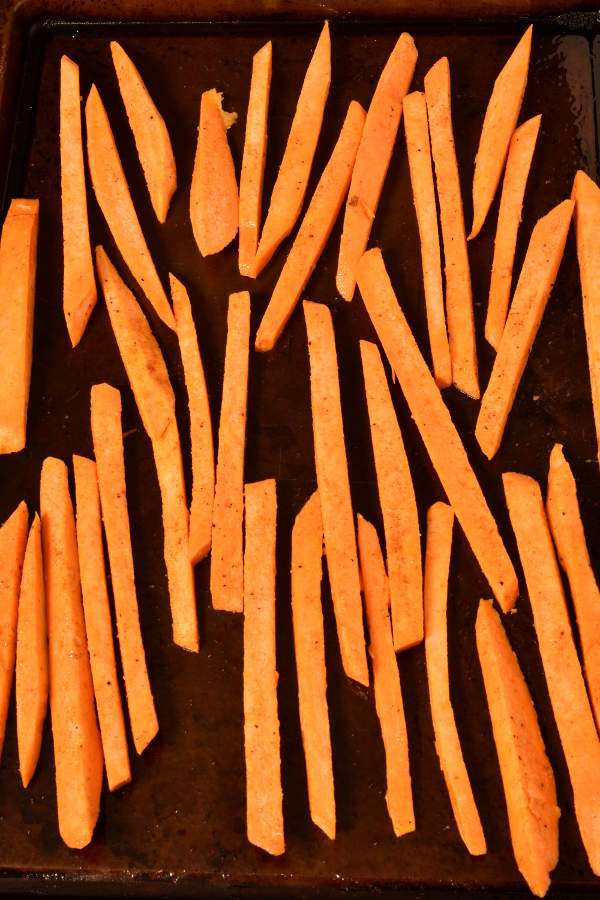
Here’s a tray of my fries before baking:
I hope you’ll give this recipe a try, and let me know what you think!

Cornish Hen Under a Brick
Cornish Hen Under a Brick gives you super crispy skin and juicy meat. No actual brick required! Can be made with chicken too. Sweet and salty sweet potato oven fries on the side.
Ingredients
- 1 (2 pound) whole Cornish hen
- salt and pepper
- 1 tablespoon grapeseed or canola oil
- 2 large sweet potatoes, cut into thin fry shapes (peel first if you prefer without skin)
- 1 1/2 tablespoons corn starch
- 1/2 teaspoon paprika
- 1/2 teaspoon garlic powder
- 2 tablespoons olive oil, divided
Instructions
- Preheat oven to 400 degrees. Spray 2 sheet pans with cooking oil spray and set aside.
- Pat Cornish hen dry with paper towels. Now we are going to make 2 flat pieces. (See the pictures in this post for an illustration.) Turn the bird upside down and use kitchen shears to cut along each side of the backbone to remove the backbone. Use a paring knife to cut along both sides of the breast bone (the soft, cartilage-like bone) and then use your fingers to pull it out. (You can also use shears or a knife at the end where it’s harder.) Then cut the hen completely in half along the line where the breast bone was. Slip a paring knife under the rib bones and cut them out from each half. Lastly, cut off the tips of the wings. Your 2 pieces should now life flat. If not, you can help it along by giving it a good smack with a heavy-bottomed pan. Season with salt and pepper.
- Heat grapeseed or canola oil in your larger cast iron pan over medium-high heat. Place the hen halves in the pan, skin side down. Put a second, smaller cast iron pan over the hens and press down. Put something in the top pan to weigh it down. I used my teapot filled with water. You could also use canned goods. Turn heat down to medium and cook for 17-20 minutes, until the skin is a deep golden brown.
- While hen is cooking, prepare sweet potato fries. Put sweet potatoes in a large Ziploc bag with corn starch, paprika, garlic powder, and salt and pepper. Shake so all the fries are coated evenly. Then divide the sweet potatoes between the 2 sheet pans. Pour 1 tablespoon olive oil over each pan. Mix with your hands so the fries all get coated evenly with oil. Spread out so fries are in a single layer. Bake for 15 minutes. Turn fries over with a spatula and bake for another 10 minutes.
- After hen has been cooking for 17-20 minutes and skin is golden brown, remove the weights and top pan. You won’t need them anymore. Use a spatula and carefully ease it under the skin to turn over the hen without breaking the skin. (That’s just for aesthetics. If it does break, it will still taste great.) If you have a splatter guard, I suggest you use it. If not, stand back! Cook for another 5 minutes, until hen is cooked through (internal temperature of 165 degrees). Let rest 5 to 10 minutes before serving.
Recipe Notes
If you prefer, you can make this recipe with a whole chicken. I’ve made it with a 4 pound chicken. After you flip the chicken over in step 5, transfer the whole pan to the 400 degree oven and bake 15 – 20 minutes, until chicken is cooked through or reaches an internal temperature of 165 degrees.
Bon Appétit!
Leave a Reply